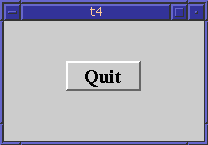

This example shows how to create your own widget, how to control the minimum and maximum sizes of a widget, and introduces widget names.
/****************************************************************
**
** Qt tutorial 4
**
****************************************************************/

#include <qapplication.h>
#include <qpushbutton.h>
#include <qfont.h>

class MyWidget : public QWidget
{
public:
    MyWidget( QWidget *parent=0, const char *name=0 );
};

MyWidget::MyWidget( QWidget *parent, const char *name )
        : QWidget( parent, name )
{
    setMinimumSize( 200, 120 );
    setMaximumSize( 200, 120 );

    QPushButton *quit = new QPushButton( "Quit", this, "quit" );
    quit->setGeometry( 62, 40, 75, 30 );
    quit->setFont( QFont( "Times", 18, QFont::Bold ) );

    connect( quit, SIGNAL(clicked()), qApp, SLOT(quit()) );
}

int main( int argc, char **argv )
{
    QApplication a( argc, argv );

    MyWidget w;
    w.setGeometry( 100, 100, 200, 120 );
    a.setMainWidget( &w );
    w.show();
    return a.exec();
}
    class MyWidget : public QWidget
    {
    public:
        MyWidget( QWidget *parent=0, const char *name=0 );
    };
Here we create a new class. Since this class inherits from QWidget, the new class is a widget, and may be a top level window or a child widget (like the push button in chapter three).
This class has only one member, a constructor (in addition to the members it inherits from QWidget). The constructor is a standard Qt widget constructor; you should always include a similar constructor when you create widgets.
The first argument is its parent widget. To create a top level window you specify a null pointer as the parent. As you can see, the widget defaults to be a top level window.
The second argument is the widget's name. This is not the text that appears in the title bar or in the button. It is a name associated with a widget to make it possible to lookup this widget later. Widget names will become really useful when Qt's GUI designer is finished.
    MyWidget::MyWidget( QWidget *parent, const char *name )
            : QWidget( parent, name )
The implementation of the constructor starts here. Like all widgets,
it just passes on the parent and name to the QWidget
constructor.
    {
        setMinimumSize( 200, 120 );
        setMaximumSize( 200, 120 );
Since this widget doesn't know how to handle resizing, we fix its size by setting the minimum and maximum to be equal. In the next chapter, we will show how a widget can respond to resize event from the user.
        QPushButton *quit = new QPushButton( "Quit", this, "quit" );
        quit->setGeometry( 62, 40, 75, 30 );
        quit->setFont( QFont( "Times", 18, QFont::Bold ) );
Here we create and set up a child widget of this widget (the new widget's
parent is this) which has the widget name "quit". The widget
name has nothing to do with the button text, they just happen to be
similar in this case.
Note that quit is a local variable in the constructor. MyWidget does
not keep track of it, but Qt does, and will by default delete it when
MyWidget is deleted. This is why MyWidget doesn't need a destructor. On
the other hand, there is no harm in deleting a child when you choose to,
the child will automatically tell Qt about its imminent death.
The setGeometry() call does the same as move() and resize() did in the previous chapters.
        connect( quit, SIGNAL(clicked()), qApp, SLOT(quit()) );
    }
Since the MyWidget class doesn't know about the application object, it
has to connect to Qt's pointer to it, qApp.
A widget is a software component and should know as little as possible about its environment in order to be as general and reusable as possible.
Knowing the name of the application object would break this principle, so Qt offers an alias, qApp, for the rare cases where a component such as MyWidget needs to talk to the application object.
    int main( int argc, char **argv )
    {
        QApplication a( argc, argv );

        MyWidget w;
        w.setGeometry( 100, 100, 200, 120 );
        a.setMainWidget( &w );
        w.show();
        return a.exec();
    }
Here we instantiate our new baby, set it to be the main widget, and execute the application.
This program is very similar in behavior to the previous one. The difference lies in the way we have implemented it. It does behave slightly different though. Just try to resize it to see.
Try to create another MyWidget object in main(). What happens?
Try to add more buttons, or put in widgets other than QPushButton.
The background color can be changed.
You may now go on to chapter five.
[Previous tutorial] [Next tutorial] [Main tutorial page]
| Copyright © 1998 Troll Tech | Trademarks | Qt version 1.42
|